There are often several different ways to design one's analytical approach to a specific sample. For example, trace element characterization can be approached using various methods contained in Probe for EPMA and it is up to the analyst to decide which approach they deem the best for a particular situation.
For instance, often when I want to measure trace elements in a beam sensitive glass or apatite, my students will often design a "combined condition" analytical setup where the major elements are measured at a low beam current, often using the TDI (time dependent intensity) correction, followed by the trace elements measured at a higher beam current for better sensitivity. An example of this approach is seen here:

Note that both the 30 nA and the 100 nA conditions are contained in the single sample for acquisition and analysis, hence the term "combined condition" sample. There are other approaches...
Recently a student of Paul Carpenter's wanted to measure trace elements in olivine, so Paul set them up with an analytical method using two separate analytical setups, the first for the major elements at 25 nA, and a second analytical setup at 100 nA (note that Al is acquired on two spectrometers for better sensitivity) as seen here for the 25 nA setup:

and here for the 100 nA setup:
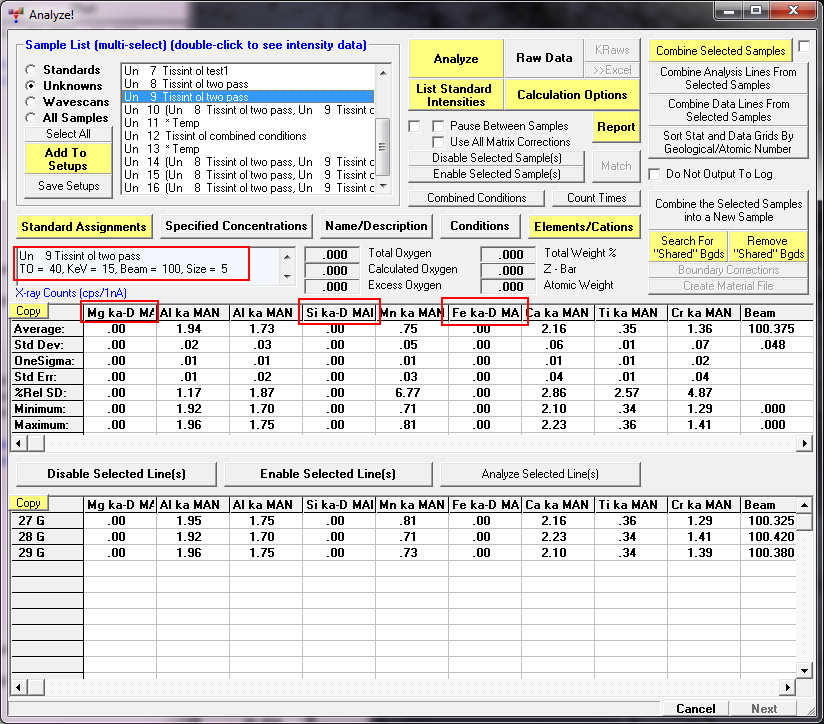
Look closely and you will note that both samples have the same elements! However, the first analytical setup has all the trace elements disabled for acquisition (and quant), and the second analytical setup has all the major elements disabled for acquisition (and quant). Please note that the disable acquisition and disable quant checkboxes are found in the Elements/Cations dialog for each element.
So, what Paul does is have the student assign *both* analytical setups to each digitized stage coordinate in the Automate! window using the Multiple Setups button. That way the program acquires each analytical setup (with the different beam currents and different elements disabled for acquisition) one after the other. Once that is done, the user can go to the Analyze! window and combine the elements for the two setups using either of the two buttons highlighted here:

The upper button doesn't permanently combine the data into a new sample, the lower button does permanently combine them. The results for the "combine selected samples" method is shown here:
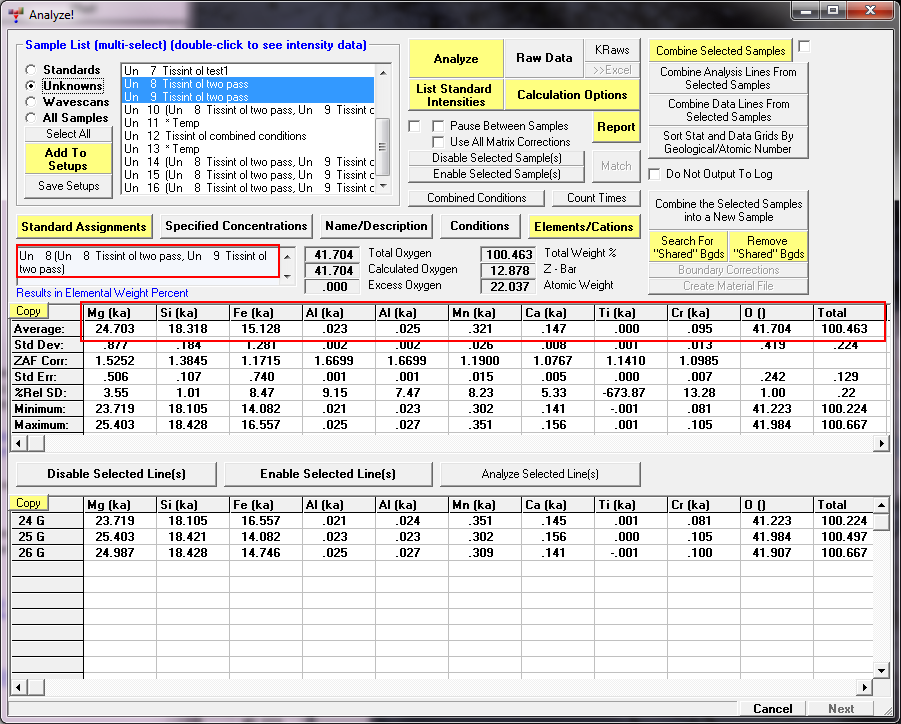
Finally, we can turn on the "aggregate" mode under the Analysis Options dialog and "aggregate" the two aluminum channels for better trace element sensitivity as seen here:


 If you can't see some "in-line" images in a post, try "refreshing" your browser!