Author Topic: Quant Mapping How-To Part 2: Map acquisition in Probe Image  (Read 12648 times)

Karsten Goemann

  • Global Moderator
  • Professor
  • *****
  • Posts: 227
Quant Mapping How-To Part 2: Map acquisition in Probe Image
« on: January 06, 2014, 02:13:22 AM »
This is the second part of the 3-part series on how to perform quantitative mapping.

See here for the first part on setup and acquisition of calibration standards in Probe For EPMA:

https://probesoftware.com/smf/index.php?topic=106.0

See here for the third part on map quantification in CalcImage:

https://probesoftware.com/smf/index.php?topic=146.0

2. Map acquisition in Probe Image

Launch Probe Image.

Go to File | Select Save To Folder... to set the path for saving the maps:


Next, go to Setup | Acquisition:


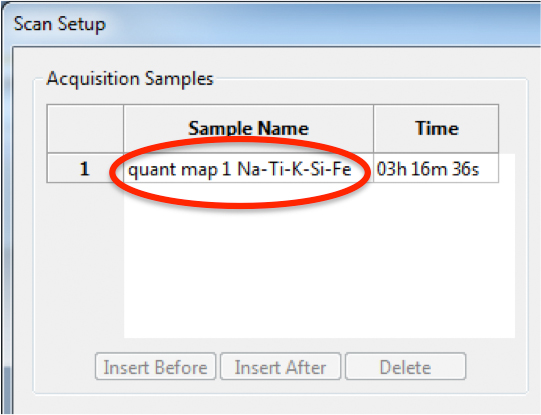
Name the first map in the Acquisition Samples section in the top left by clicking into the corresponding Sample Name field:


In the Sample Parameters section, select the map type, in this example a stage scan with the centre position and the size specified. An image size of 256x192 pixels and a pixel size of 1.0x1.0 microns gives an overall map size of 256x192 microns:


Drive the stage to the centre of the desired map area and click "Read XY" and "Read Z" to import the stage coordinates:


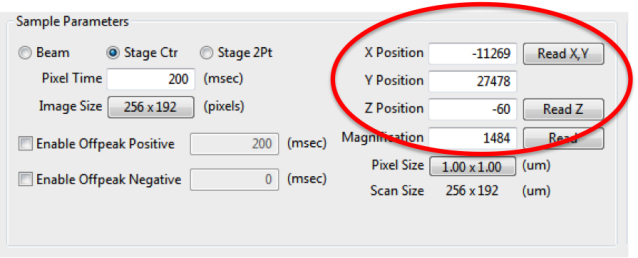
Set the Pixel Time to the desired dwell time per pixel. If input channels are enabled, the overall acquisition time will be dynamically updated:


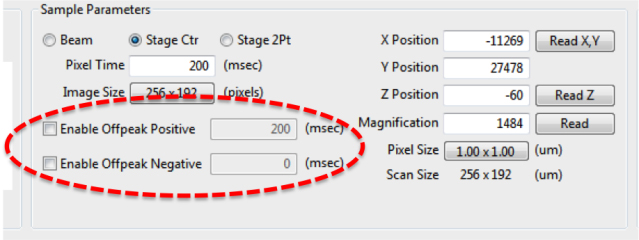
If required, enable one or both off-peak map acquisitions and specify the respective pixel dwell times. In our example we'll leave both deselected as we're using MAN background correction:


See for example this post for more details regarding MAN backgrounds:
http://probesoftware.com/smf/index.php?topic=4.msg499#msg499

In the lower part of the window, tick the boxes to enable the WDS. Click the "Read ELM" buttons for each channel to import the parameters for the first 5 elements:


For the Read ELM to work requires the correct path to Probewin.ELM to be specified in Probe Image under Setup | Probe Image Setup | Application | Default Paths | Probe for EPMA element file.

EDS channels can be specified on the EDS Inputs tab if possible for the specific microprobe/EDS combination, for example in the case of a Cameca SX100/SXFive with the integrated Bruker EDS. Simultaneous acquisition of other images (SE, BSE, CL, as available) can be enabled on the Analog Inputs page.

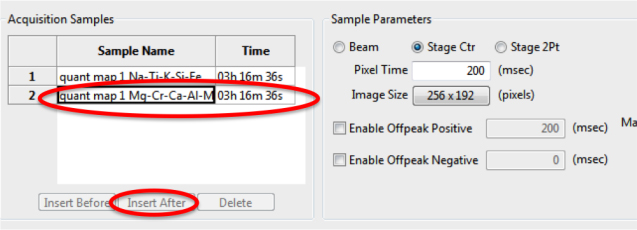
Click the "Insert After" button in the Acquisition Samples section to create another map with the same settings:


In PFE, create a new unknown sample and load the Sample Setup for the second five elements. Again go to Acquire! | Peaking Options and click "Move To On Peak (start analysis) Positions". Wait until the move is completed then click "Read ELM" again for the WDS channels in Probe Image:


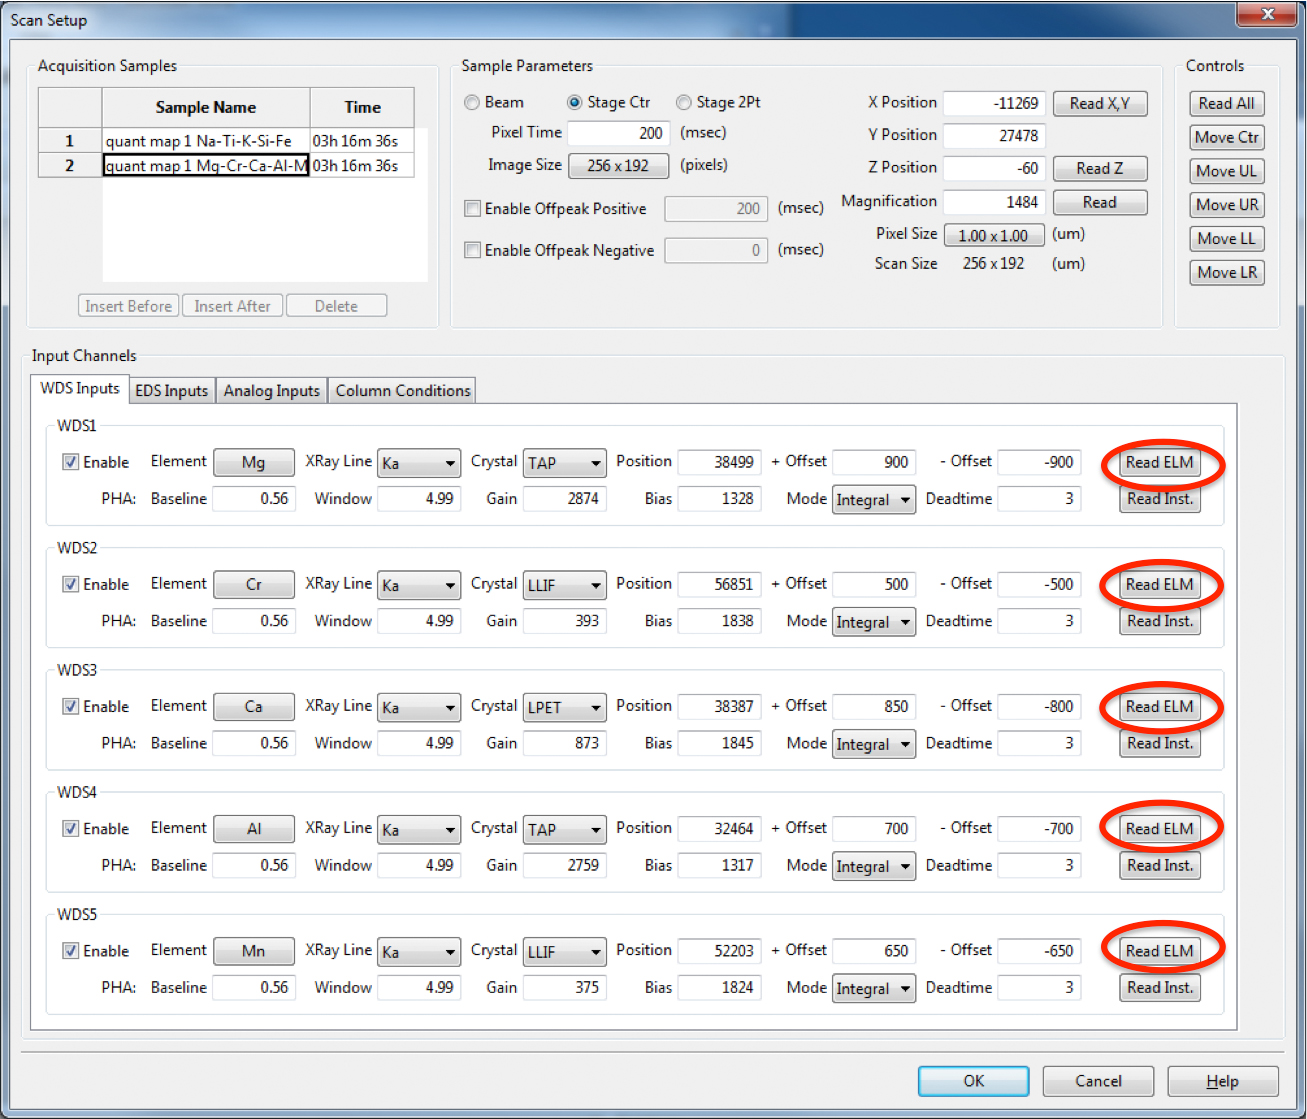
Finally, click OK in the bottom right corner to close the Scan Setup window.

Set conditions (accelerating voltage, beam current, beam diameter) on the instrument as desired.

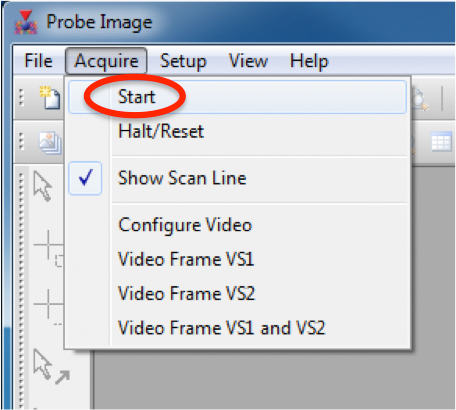
To start the acquisition, select "Start" from the Acquire menu:


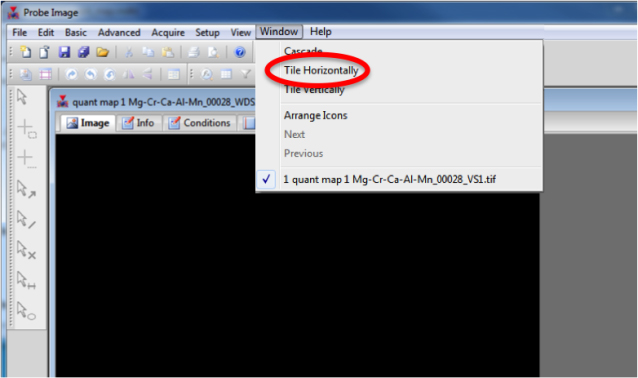
Probe Image now opens a new image window for every WDS, EDS, and electron image:


To arrange the image windows next to each other, select for example "Tile Horizontally" from the Window menu:


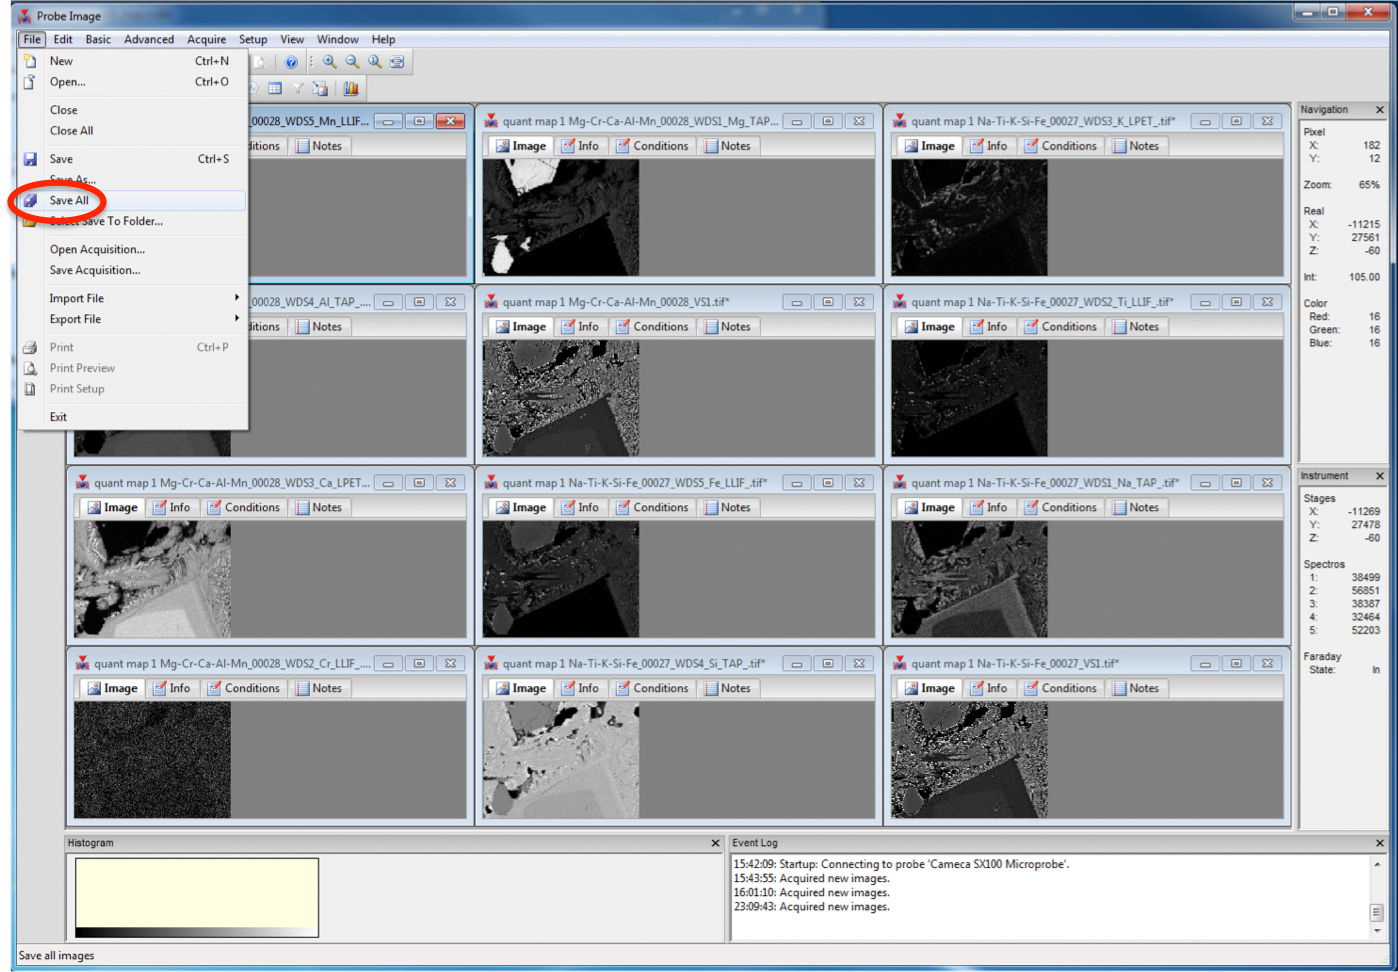
The image windows are updated whenever a line acquisition is completed as shown here for the 5 elements in the first map acquisition:


At the end of the multiple map acquisition, Probe Image will insert the Faraday cup.

Save all images by selecting "Save All" in the File menu:


The maps are now ready for quantification and further processing in CalcImage, see here:
http://probesoftware.com/smf/index.php?topic=146.0


Cheers,

Karsten
« Last Edit: August 24, 2018, 08:29:57 AM by John Donovan »

Gareth D Hatton

  • Professor
  • ****
  • Posts: 51
Re: Quant Mapping How-To Part 2: Map acquisition in Probe Image
« Reply #1 on: January 06, 2014, 04:24:45 AM »
I think that it may also be useful to point out that the aquisition settings can be saved and re-loaded which may save time in future if you do many of the same types of analysis...

File -> Save Aquisition...

I can see this being of particular use if you have lots of elements setup as multiple runs as in the example.
« Last Edit: January 06, 2014, 09:15:56 AM by John Donovan »

Ben Buse

  • Professor
  • ****
  • Posts: 488
Re: Quant Mapping How-To Part 2: Map acquisition in Probe Image
« Reply #2 on: September 04, 2015, 02:55:30 AM »
If quantifying maps in CalcImage: What I've found helpful is that if you save the maps to a folder which does not contain the MDB file (e.g. quant point folder with MDB and map folder with maps. Or map folder for each map) - copy the MDB file into the map folder.

This means it is easy to find when you quant the maps in CalcImage & it means that the output quant maps are stored in the same folder as the original maps.

Ben
« Last Edit: September 04, 2015, 08:50:46 AM by John Donovan »

Probeman

  • Emeritus
  • *****
  • Posts: 2839
  • Never sleeps...
    • John Donovan
Re: Quant Mapping How-To Part 2: Map acquisition in Probe Image
« Reply #3 on: September 04, 2015, 08:56:27 AM »
If quantifying maps in CalcImage: What I've found helpful is that if you save the maps to a folder which does not contain the MDB file (e.g. quant point folder with MDB and map folder with maps. Or map folder for each map) - copy the MDB file into the map folder.

This means it is easy to find when you quant the maps in CalcImage & it means that the output quant maps are stored in the same folder as the original maps.

Ben

Hi Ben,
Nothing wrong with organizing things.

I sometimes copy the MDB file to multiple folders for running the same data with different options in order to have the results saved separately.
« Last Edit: September 04, 2015, 11:20:46 AM by John Donovan »
The only stupid question is the one not asked!

Ben Buse

  • Professor
  • ****
  • Posts: 488
Re: Quant Mapping How-To Part 2: Map acquisition in Probe Image
« Reply #4 on: December 15, 2018, 07:16:53 AM »
This is a warning when running multiple maps - each has its own settings.

I set up 6 important maps - but I created them - and then noticed 3 of the spectrometers were disabled - so I enabled them for the first map - but they were not enabled for the subsequent maps. Big mistake, since I haven't time to redo them

Moral of the story - you need to either get the first map correct then append the subsequent maps - which I meant to do - or if you make changes, change all maps.

Ben

Probeman

  • Emeritus
  • *****
  • Posts: 2839
  • Never sleeps...
    • John Donovan
Re: Quant Mapping How-To Part 2: Map acquisition in Probe Image
« Reply #5 on: December 15, 2018, 08:46:18 AM »
This is a warning when running multiple maps - each has its own settings.

I set up 6 important maps - but I created them - and then noticed 3 of the spectrometers were disabled - so I enabled them for the first map - but they were not enabled for the subsequent maps. Big mistake, since I haven't time to redo them

Moral of the story - you need to either get the first map correct then append the subsequent maps - which I meant to do - or if you make changes, change all maps.

Ben

Hi Ben,
Yes, each map acquisition is totally separate from the others.

That gives one a lot of flexibility with their x-ray map acquisitions, but also the freedom to make mistakes!

john

PS Are you working the weekend shift?    :)
The only stupid question is the one not asked!